Getting started with OptiPick
This page describes the different steps to get you up and running with our API. In a nutshell, you will need to:
-
create one or more warehouse floor plans using our web application
-
perform strategic analyses to identify the warehouses with the highest potential
-
create API keys
-
interactively create and test your first API calls
-
integrate these calls into your WMS
Creating your floor plan
Floor plans can be created using our web application. This application provides a 2D
editor to easily create your own detailed floor plan. The floor plan is used by our
algorithms to optimize the picking process. A site name set by you in the web application
will be provided to every API call to identify the correct warehouse.
The floor plan editor is currently under construction, so stay tuned here for a more in-depth guide on how to use the editor later!
For now, we will use the following simple warehouse, with site name Example as a
running example for the rest of this guide:
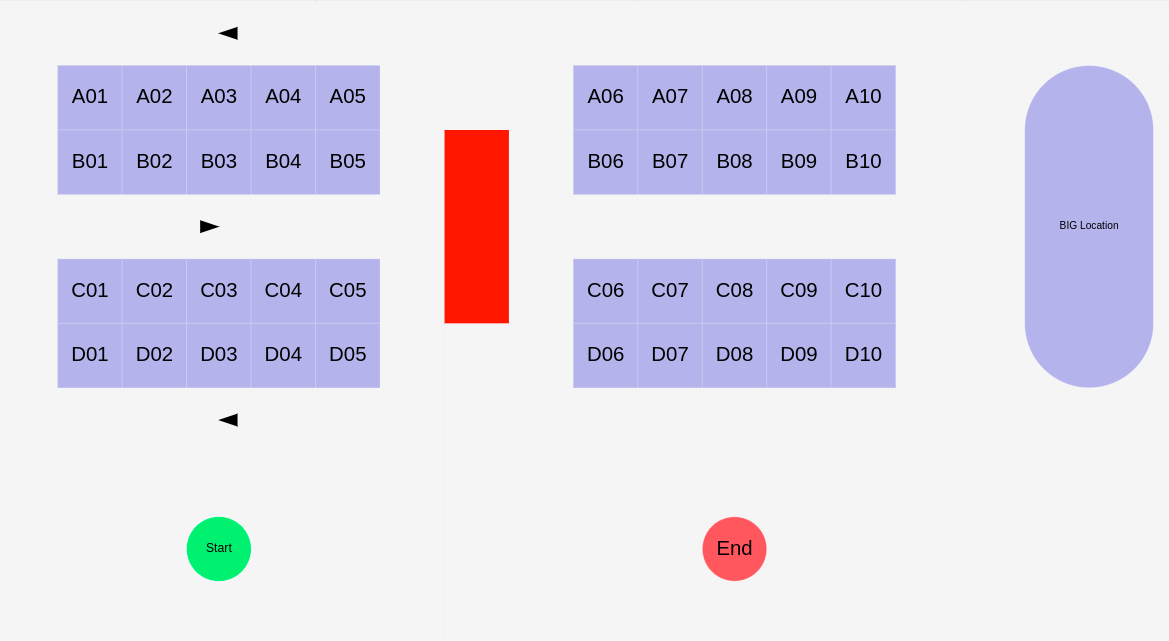
Our WMS currently stores a static lookup table that maps location IDs onto numbers which are then sorted increasingly such that this corresponds to a typical walking snake, as shown below:

To batch orders together, our WMS uses business rules to create different waves based on delivery dates and their carriers. Then orders are sorted by their delivery dates and batched from the top of the list till the bottom until a batch is full. As our trolley contains only two different contains, we consider a batch to be full when there are two orders assigned to it.
(Optional) Performing strategic analyses
This step is optional, but the impact of our different algorithms can be estimated
using our web application. Once your warehouse is created, and you have some historical data,
go to the Strategic Analysis page on our webapp:
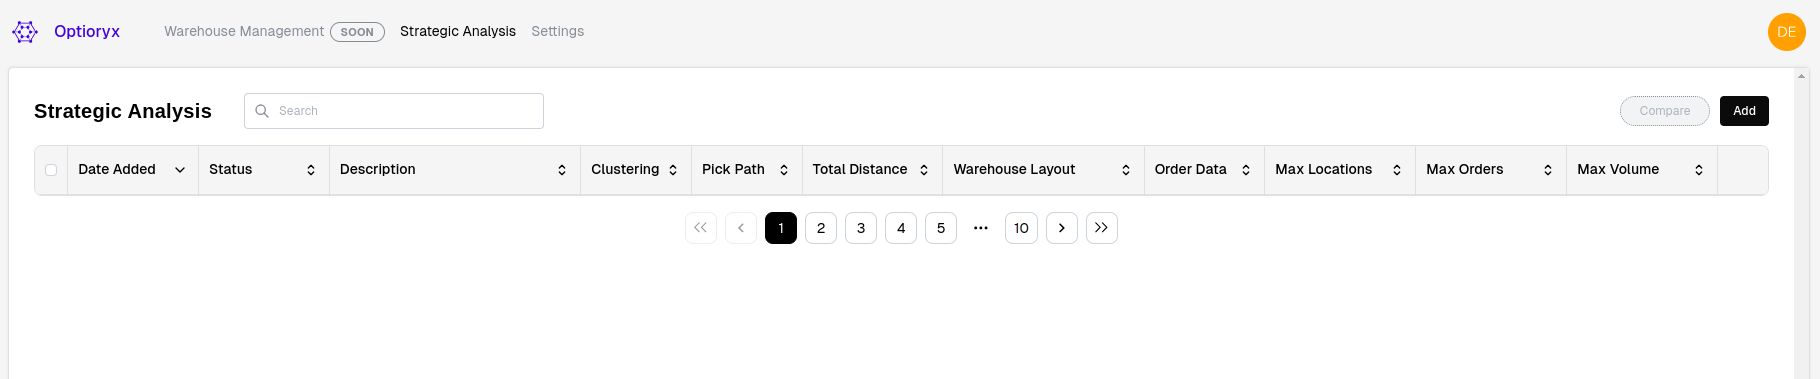
And click on the "Add" to add a new analysis:
The data we upload has to follow a certain template. For this example, we uploaded the following data:
    WAVE_ID  ORDER_ID  LIST_ID   LOCATION_ID SKU_ID  ASIS_SEQUENCE  PICK_ID
0         1         1        1           D10  DUMMY              1        0
1         1         1        1           D03  DUMMY              8        1
2         1         1        1           B01  DUMMY             12        2
3         1         2        1           B04  DUMMY             18        3
4         1         2        1           B10  DUMMY             30        4
5         1         3        2           D08  DUMMY              3        5
6         1         3        2           B06  DUMMY             22        6
7         1         3        2           B09  DUMMY             27        7
8         1         3        2           A06  DUMMY             36        8
9         1         3        2           A10  DUMMY             32        9
10        1         4        2  BIG Location  DUMMY             31       10
11        1         5        3           D05  DUMMY              6       11
12        1         5        3           D01  DUMMY             10       12
13        1         5        3           A01  DUMMY             41       13
14        1         5        3           B10  DUMMY             30       14
15        2         6        4           D10  DUMMY              1       15
16        2         6        4           D05  DUMMY              6       16
17        2         6        4           C01  DUMMY             11       17
18        2         6        4           B06  DUMMY             22       18
19        2         6        4  BIG Location  DUMMY             31       19
20        2         6        4           A10  DUMMY             32       20
21        2         6        4           A01  DUMMY             41       21
22        2         7        5           D05  DUMMY              6       22
23        2         8        5           B02  DUMMY             14       23
24        2         9        6           D10  DUMMY              1       24
25        2         9        6           A10  DUMMY             32       25
26        2        10        6  BIG Location  DUMMY             31       26
27        2        10        6           A05  DUMMY             37       27
28        2        10        6           A01  DUMMY             41       28
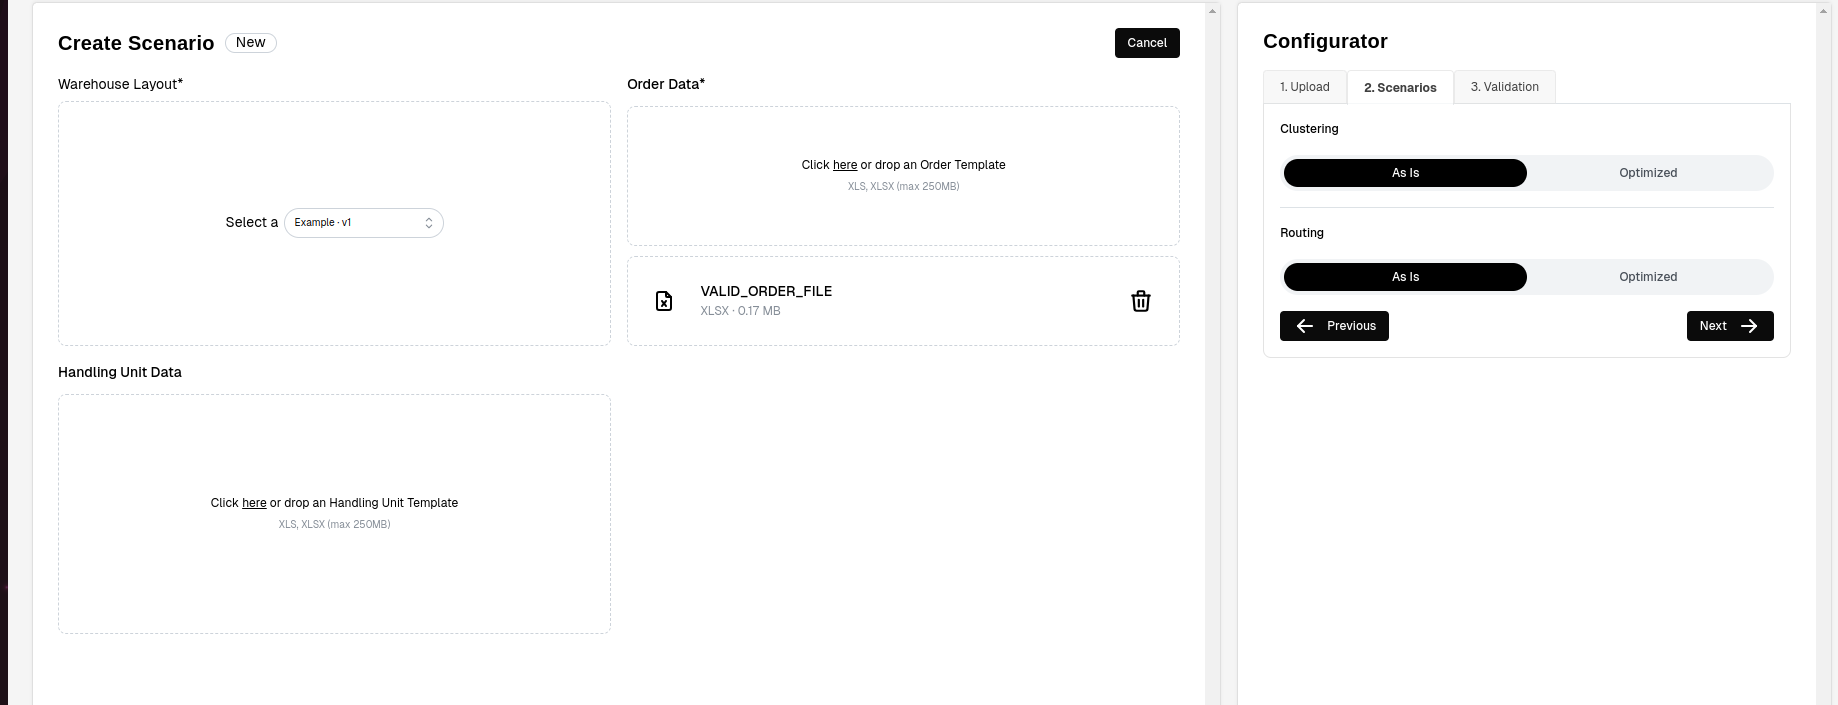
After uploading two scenarios to simulate the as-is situation and the situation when
using OptiRoute and OptiGroup, we can compare both scenarios, inspect individual routes
and even draw heatmaps:
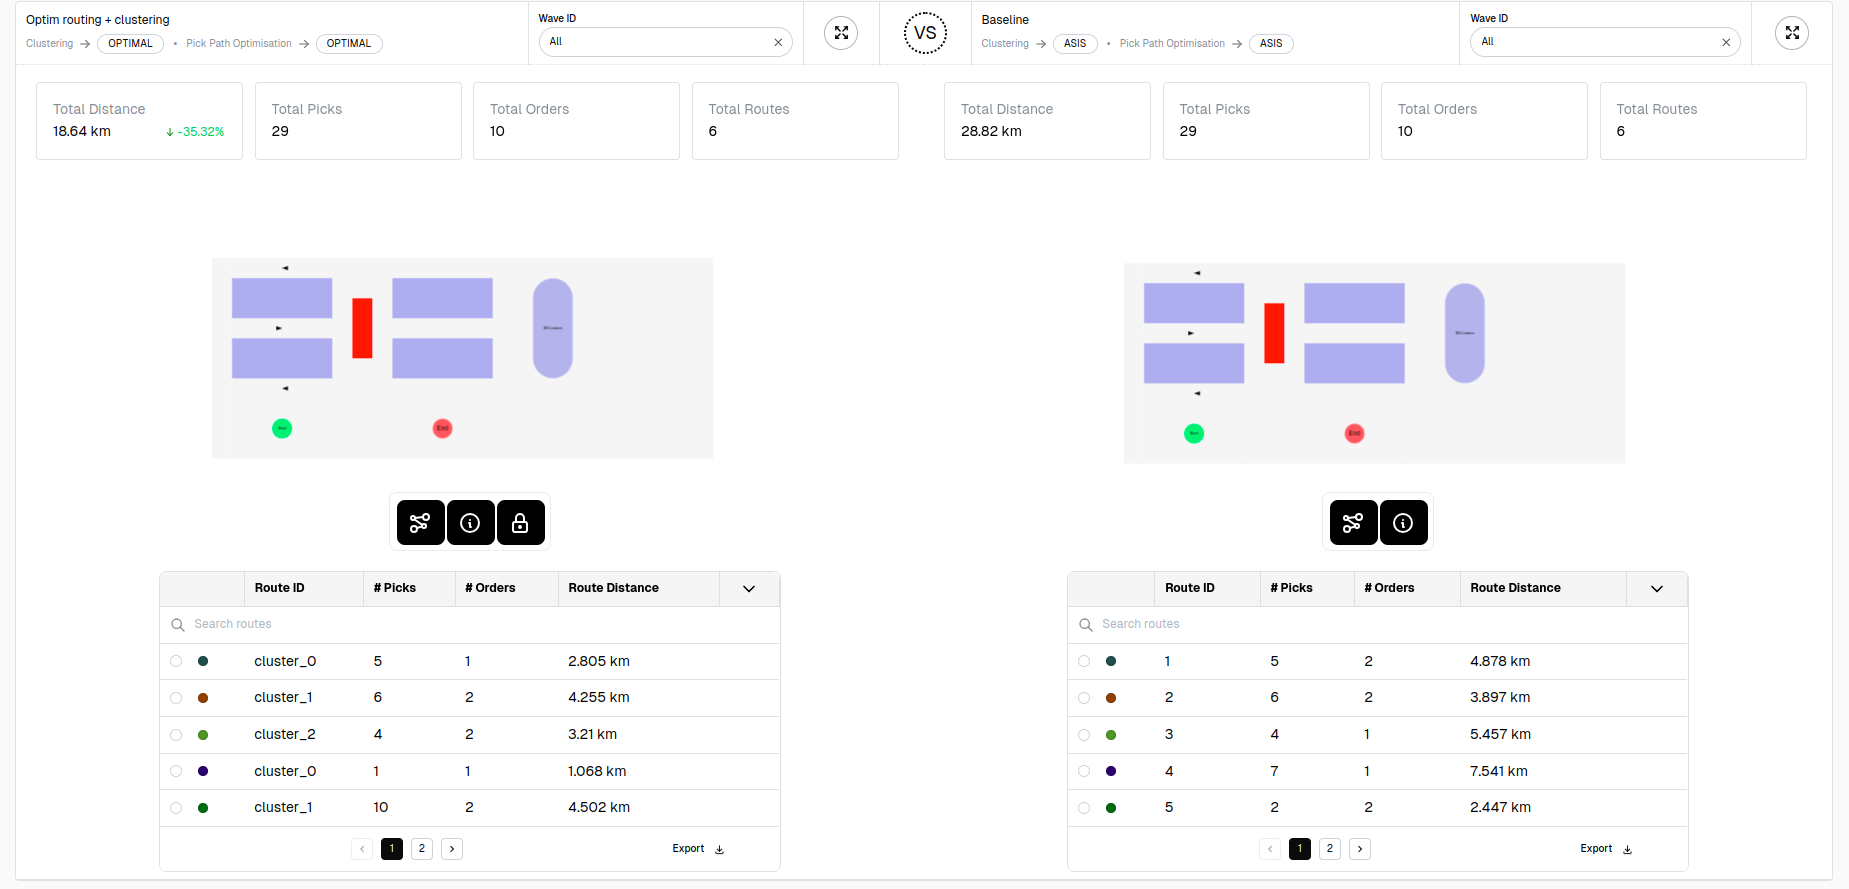
35.32% is a significant reduction in walking distance, so lets start integrating this into our WMS!
Creating API keys
The next step is to create an API key, we have a separate guide for that.
Interactively using the API
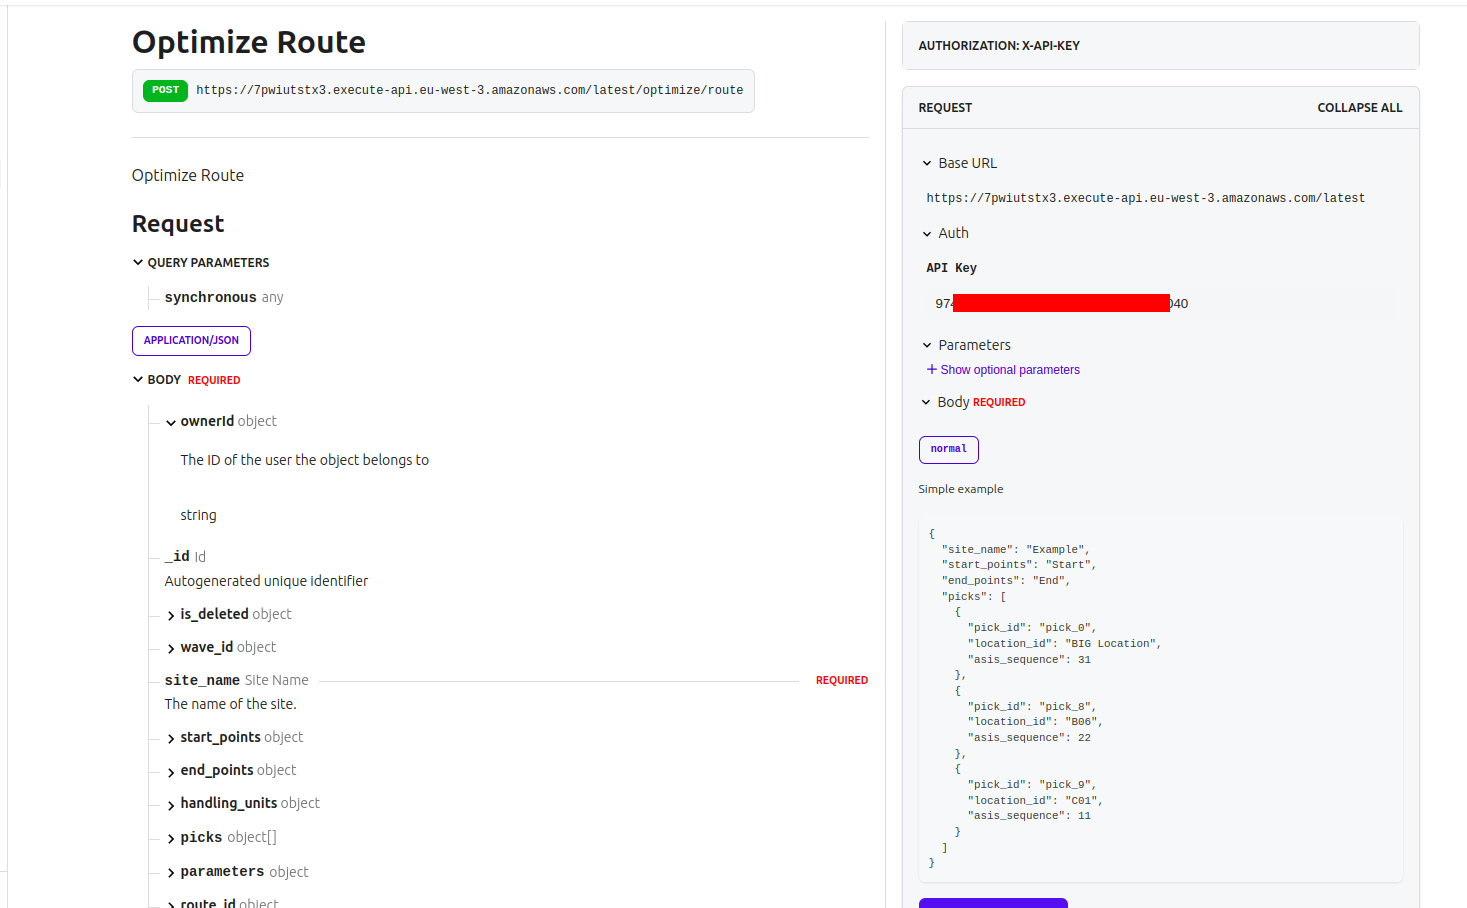
Our API can interactively be used through this documentation website! You two most relevant routes are
As an example, let's create our first request to the OptiRoute API endpoint. After carefully reading the docs, we notice that the request model is rather simple and requires a site_name, a start location, an end location and a list of different picks that need to be executed. Every pick consist at least out of a unique pick id and a location id. Additionally, we can specify an as-is sequence number.
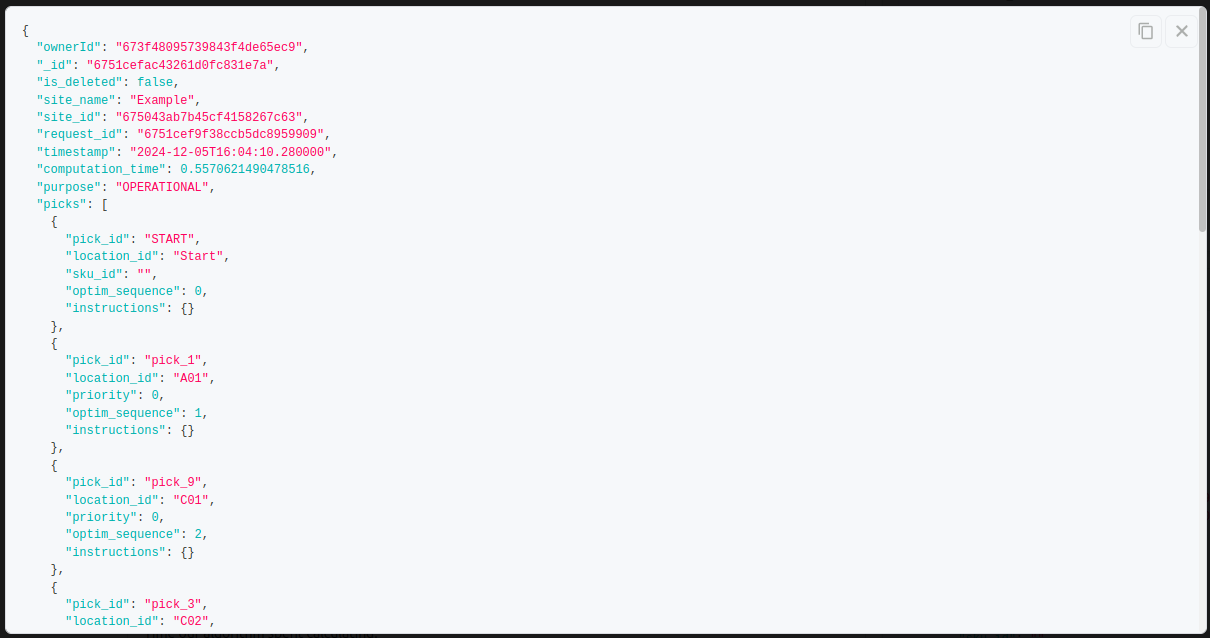
After clicking on SEND API REQUEST we get a response back quickly:
Getting the OptiGroup post up and running is similar, but this is a computationally more expensive process. We therefore suggest asynchronous communication. For more information on that, check out our Asynchronous Communication Guide.
Integrate into your WMS
This differs per WMS, but we would be happy to support you with this. Get in touch with us!