Business Central: Optipack Guide
Below is a schematic overview of the outbound process of Business Central.

In standard Business Central, the outbound process starts when Sales Orders are created and released for fulfillment. These orders are grouped into Warehouse Shipments, and the warehouse team executes picking and packing operations before posting the shipment. While Business Central supports tracking of item dimensions and weights through Item Attributes or custom fields, there is no built-in cartonization engine that determines how to combine multiple items into the most efficient boxes.
This means that:
- Packing is typically done manually at the packing station, or by following simple static rules (“always use box type A unless item X is present”).
- Item dimensions and weight data are not used to compute optimal box combinations.
- There is no spatial optimization, and packaging material or freight space is often wasted.
This is where OptiPack API comes in. The API can be called after all items and quantities for a shipment are known—that is, once the Warehouse Shipment has been created and its Sales Lines are finalized, but before any Handling Units, package labels, or shipping documents are generated. At this point, the full list of items (with dimensions and weights) can be sent to OptiPack to calculate how these should be best combined into available boxes.
In the remainder of this guide we demonstrate, in a sandbox environment, how we can generate a request (JSON format) and send it to our API. We’ll add different elements to the BC UI to configure the necessary parameters and trigger these optimizations manually. Ideally, these optimizations are of course triggered automatically and results should be persisted in the necessary data tables of BC.
Required API data
Below is a minimal JSON for the /pack endpoint:
1{
2  "orders": [
3    {
4      "id": "order_1",
5      "items": [
6        {
7          "id": "item_1",
8          "width": 1,
9          "height": 1,
10          "depth": 1,
11          "quantity": 4
12        }
13      ]
14    }
15  ],
16  "bins": [
17    {
18      "id": "bin_1",
19      "width": 1,
20      "height": 1,
21      "depth": 1
22    }
23  ]
24}
It consists of the following pieces of informations:
orders: a list of the orders that must be packed; items of different orders will never be packed onto the samebin.bins: the different bins (HUs) available in the warehouse, with their dimensional information. Many other attributes & constraints are supported as well, for the full list, we refer to our API documentation.
For every order a list of items has to be provided, this contains information such as:
width,height,depth: the three dimensions of every itemquantity: how many of this item were ordered- many other possible constraints & attributes such as its weight, the weight it can carry, allowed orientations, sequence values and many many more. See our API documentation for a complete list.
While the concepts of orders and items (with identifiers and quantities) are known in a standard BC environment, important attributes such as their dimensions as well as information about the box assortment in the warehouse are optional or even missing. However, we’ll see that these elements can quickly be added to BC in the guide below.
BC Data tables
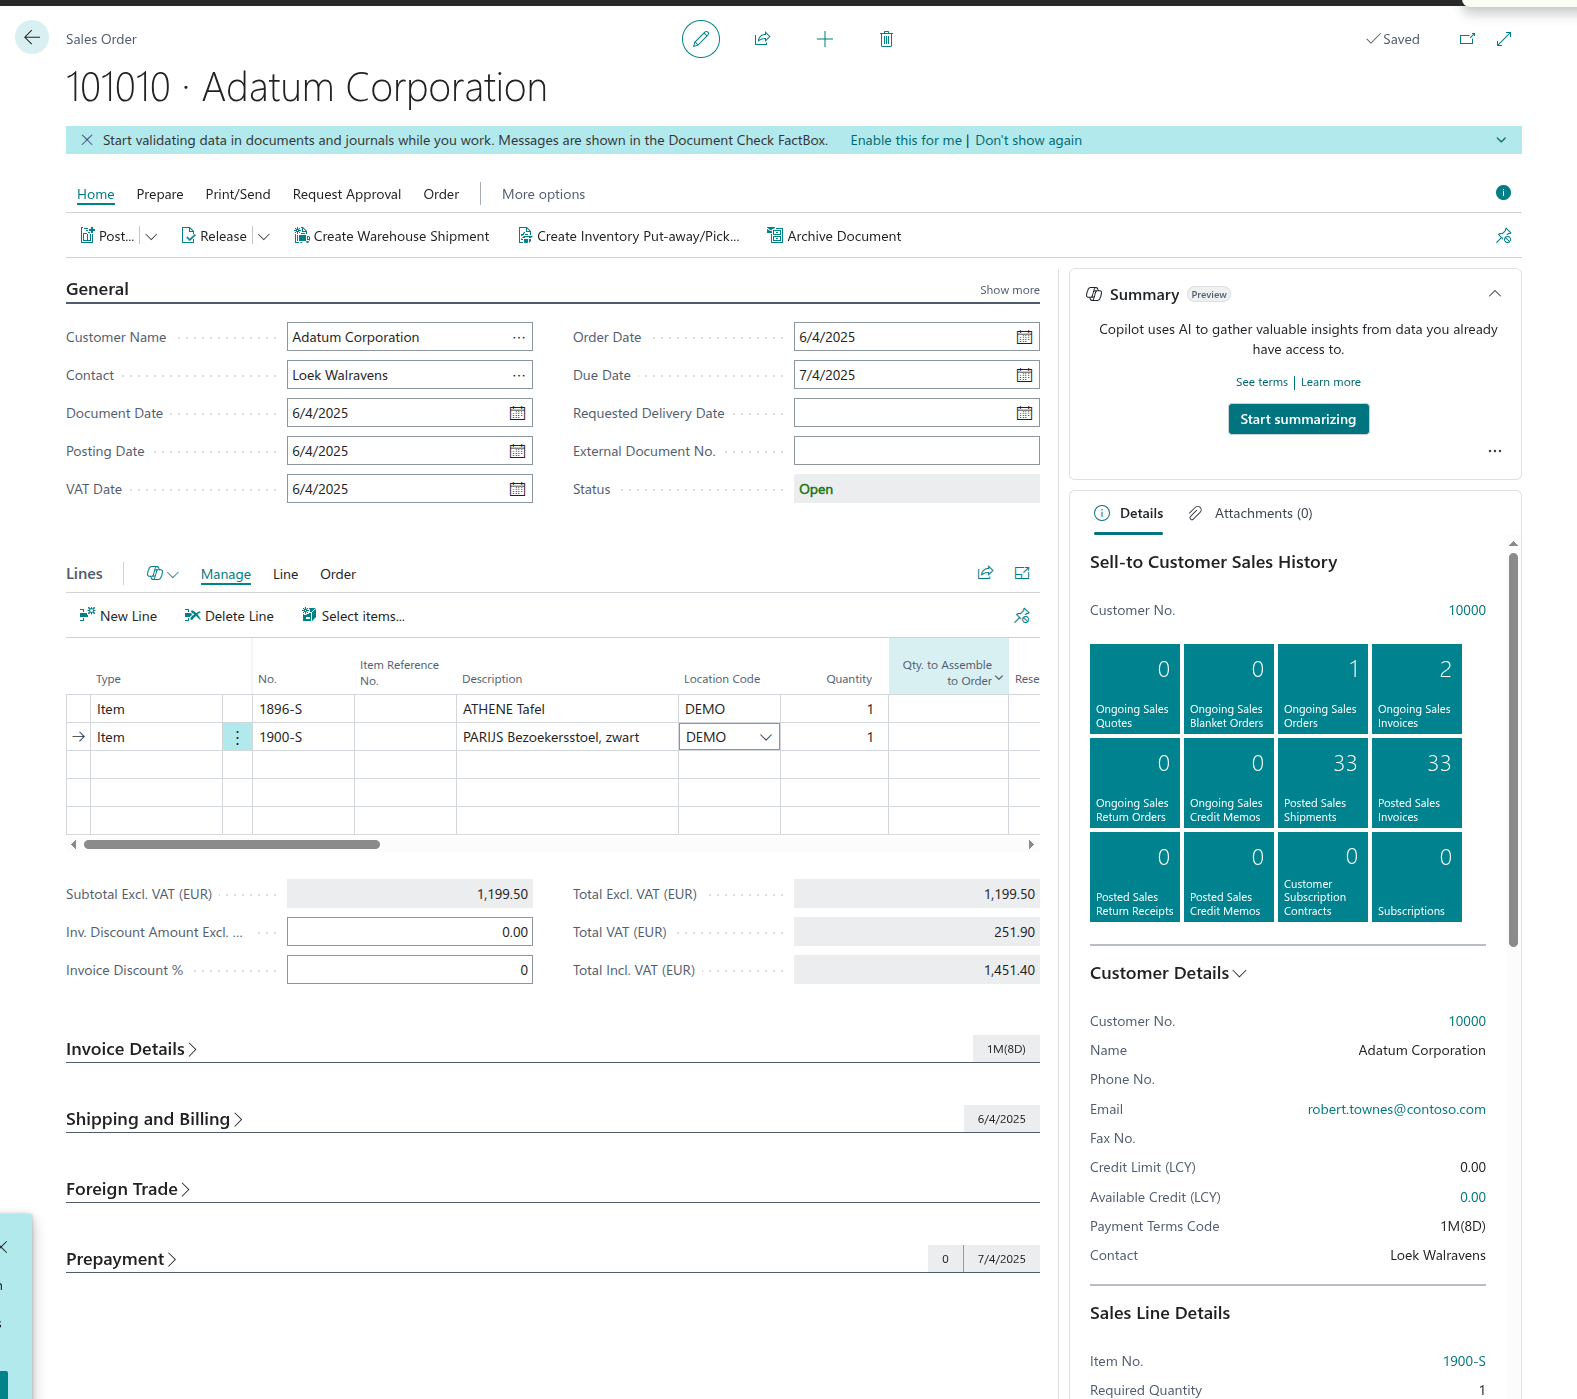
Sales Orders
As depicted in the overview of the introduction, the outbound flow starts with Sales Orders. We will create some ourselves in BC. We can navigate there through ALT + Q > Sales Orders. Once created, we need to make sure to put them in “Released” status so that they can be picked up by the Warehouse Shipments.
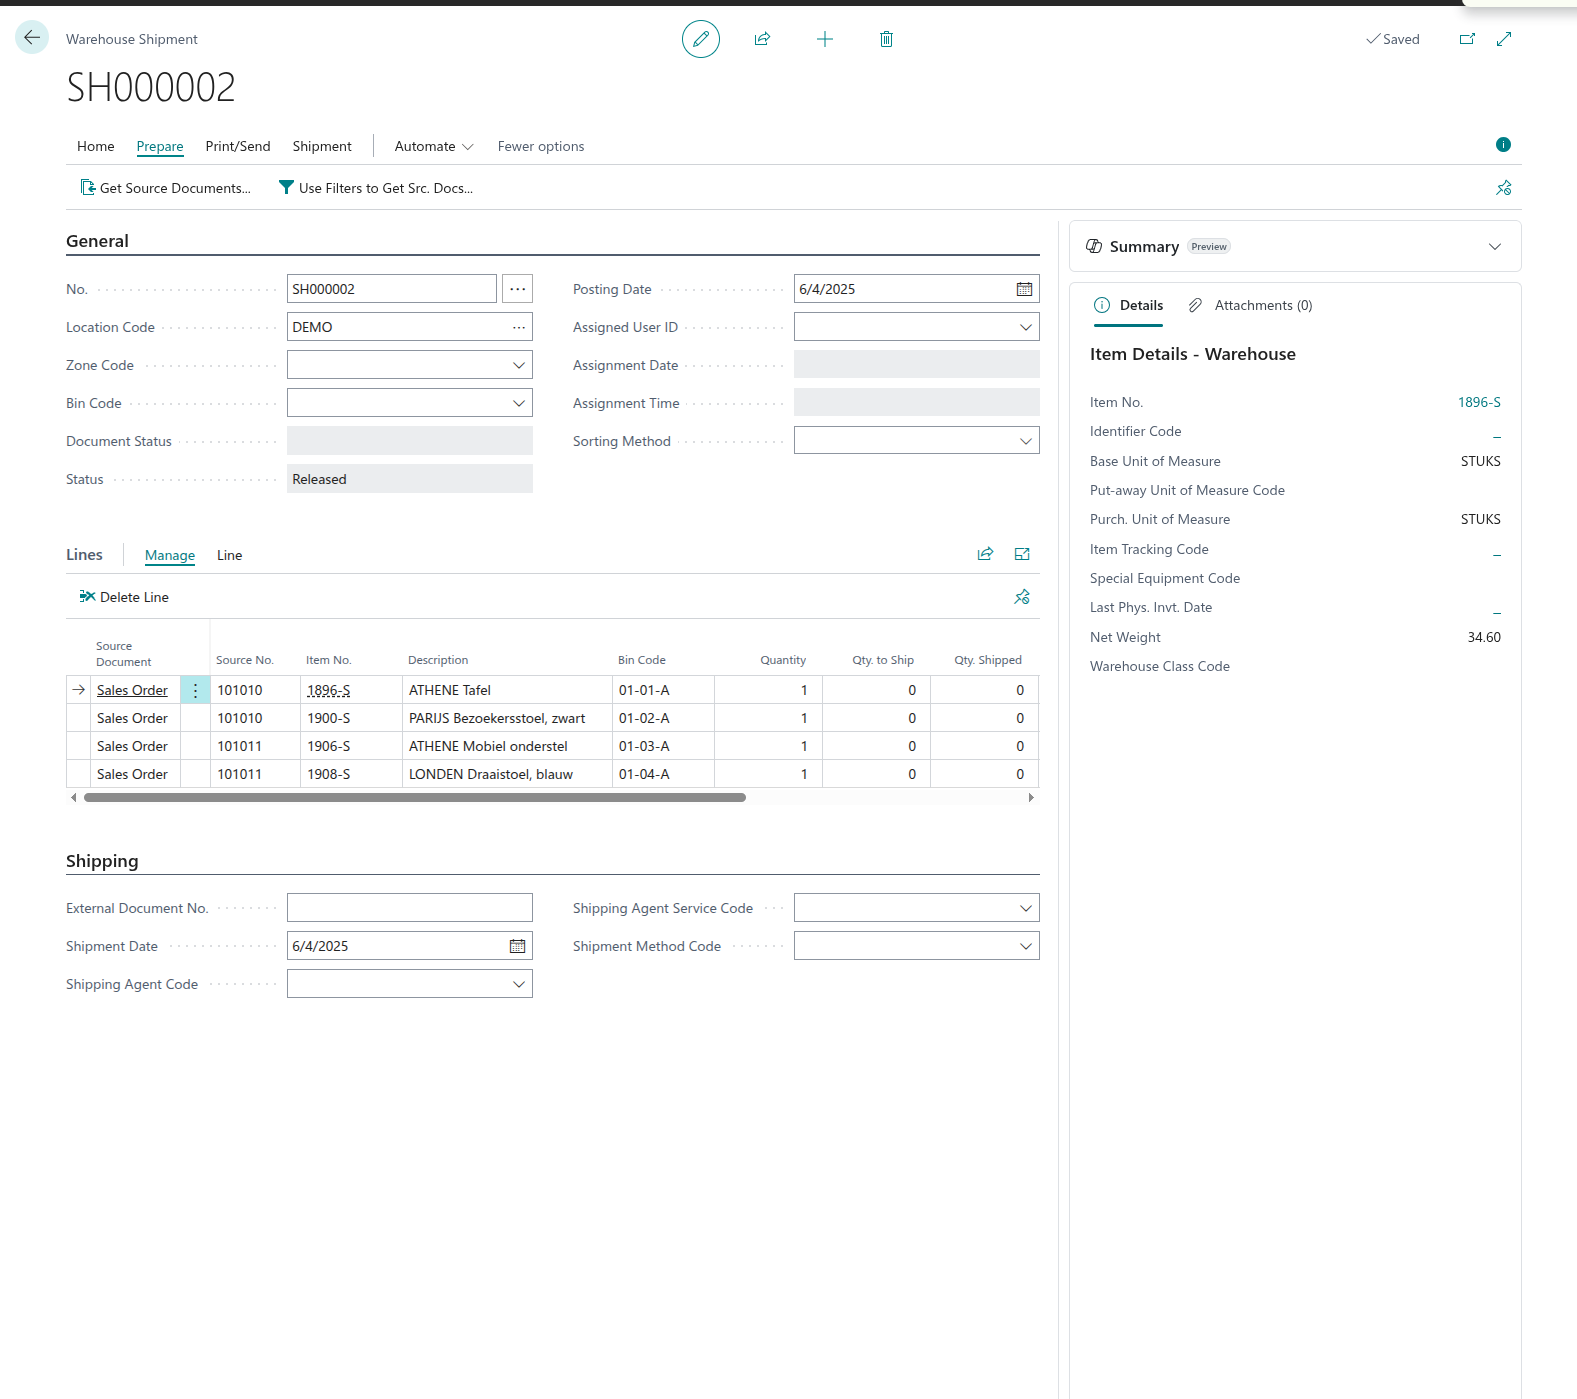
Warehouse Shipments
Once the Sales Orders are created and released, these can be turned into Warehouse Shipments, ready to be picked.
Integrating OptiPack API
Setup
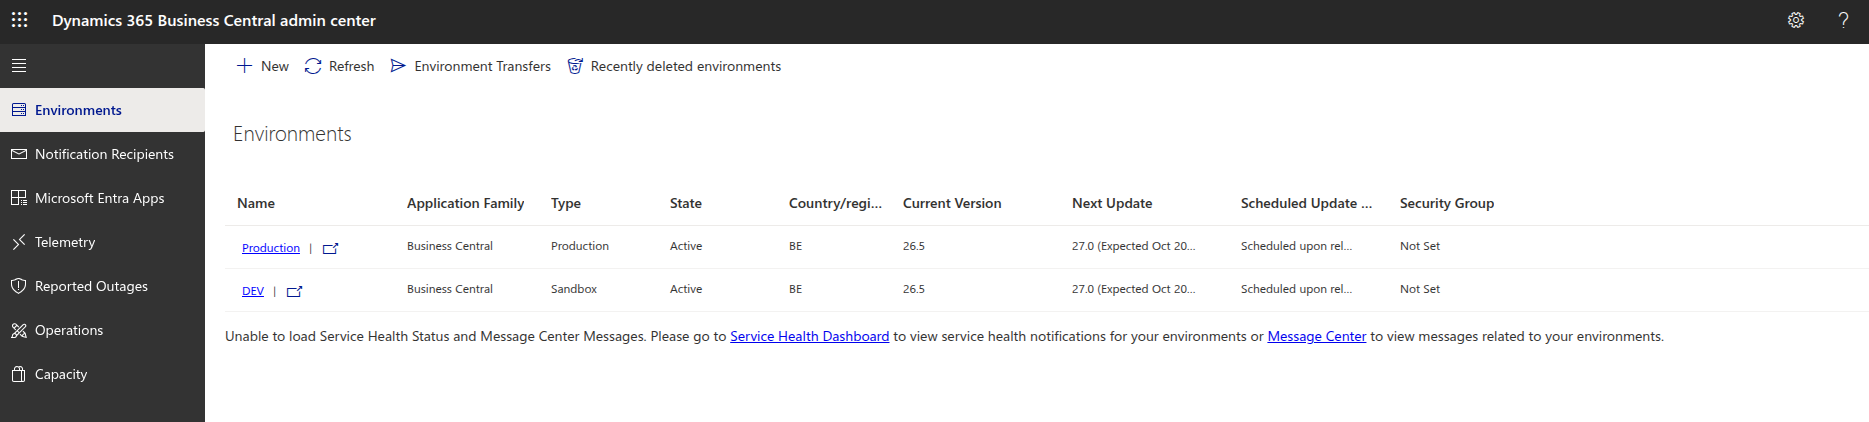
We first create a new environment using the Admin Center which can be accessed through https://businesscentral.dynamics.com/[TENANT_ID]/admin
After creating a new sandbox development environment, we create a new AL project (VSCode has excellent plugins for this) and configure our launch.json and app.json as below:
1{
2    "id": "<CENSORED>",
3    "name": "OptiPick",
4    "publisher": "Default Publisher",
5    "version": "1.0.0.0",
6    "dependencies": [],
7    "platform": "1.0.0.0",
8    "application": "26.5.38752.38944",
9    "runtime": "15.2",
10    "idRanges": [
11        { "from": 50100, "to": 50149 }
12    ]
13}
1{
2  "version": "0.2.0",
3  "configurations": [
4    {
5      "name": "BC Online",
6      "type": "al",
7      "request": "launch",
8      "server": "https://api.businesscentral.dynamics.com",
9      "environmentName": "DEV",
10      "tenant": "<CENSORED>",
11      "schemaUpdateMode": "Synchronize"
12    }
13  ]
14}
Configuration screen
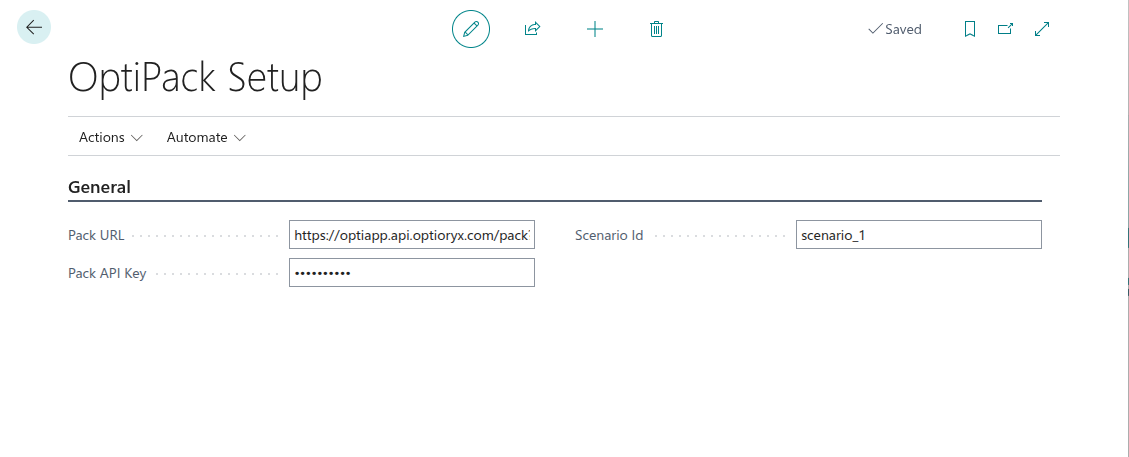
The first page we’ll be adding to our BC environment allows to configure different parameters for the API such as the endpoint URL, an API key, etc. We’ll create a table and page.
1namespace DefaultPublisher.AL;
2
3table 50122 "OptiPack Setup"
4{
5    DataClassification = CustomerContent;
6
7    fields
8    {
9        field(1; "Primary Key"; Code[10]) { DataClassification = SystemMetadata; }
10        field(10; "Pack URL"; Text[250]) { InitValue = "https://optiapp.api.optioryx.com/pack?upsert=true&synchronous=true"; }
11        field(20; "Pack API Key"; Text[250]) { ExtendedDatatype = Masked; InitValue = "<CENSORED>"; }
12        field(30; "Scenario Id"; Text[50]) { InitValue = "scenario_1"; }
13    }
14
15    keys { key(PK; "Primary Key") { Clustered = true; } }
16
17    trigger OnInsert()
18    begin
19        if "Primary Key" = '' then
20            "Primary Key" := 'SETUP';
21    end;
22}
1namespace DefaultPublisher.AL;
2
3page 50123 "OptiPack Setup"
4{
5    PageType = Card;
6    ApplicationArea = All;
7    UsageCategory = Administration;
8    SourceTable = "OptiPack Setup";
9    Caption = 'OptiPack Setup';
10
11    layout
12    {
13        area(content)
14        {
15            group(General)
16            {
17                field("Pack URL"; Rec."Pack URL") { ApplicationArea = All; }
18                field("Pack API Key"; Rec."Pack API Key") { ApplicationArea = All; }
19                field("Scenario Id"; Rec."Scenario Id") { ApplicationArea = All; }
20            }
21        }
22    }
23
24    actions
25    {
26        area(Processing)
27        {
28            action(CreateOrOpen)
29            {
30                Caption = 'Create/Init';
31                ApplicationArea = All;
32                trigger OnAction()
33                var
34                    s: Record "OptiPack Setup";
35                begin
36                    if not s.Get('SETUP') then begin
37                        s.Init();
38                        s.Insert();
39                        Message('OptiPack setup created. Fill URL and API key.');
40                    end else
41                        Page.Run(Page::"OptiPack Setup", s);
42                end;
43            }
44        }
45    }
46}
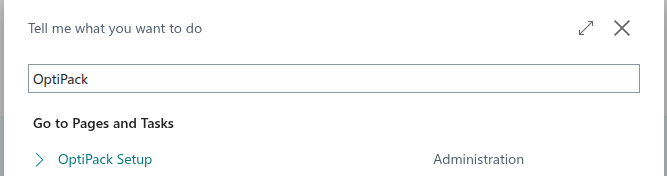
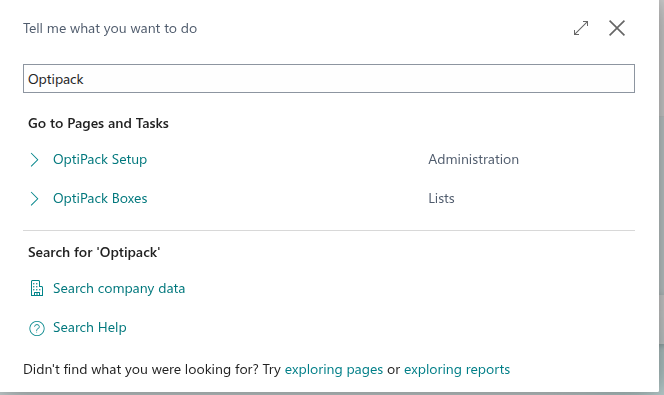
We can navigate to this new page using ALT + Q > OptiPack Setup:
Box management screen
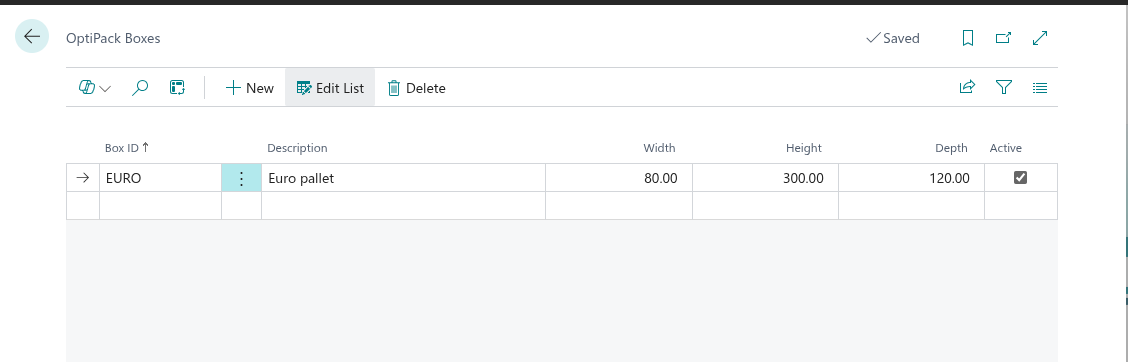
The next graphical element we’ll be adding is a table that allows us to configure the attributes, such as the dimensions, of the different boxes in our warehouse. To keep it minimal, we’ll only allow to configure dimensions, but of course more attributes that can be passed through our API, such as a maximal weight, can be added as well.
1namespace DefaultPublisher.AL;
2
3table 50120 "OptiPack Box"
4{
5    DataClassification = CustomerContent;
6
7    fields
8    {
9        field(1; Code; Code[20]) { Caption = 'Box ID'; }
10        field(10; Description; Text[100]) { Caption = 'Description'; }
11        field(20; Width; Decimal) { Caption = 'Width'; }
12        field(30; Height; Decimal) { Caption = 'Height'; }
13        field(40; Depth; Decimal) { Caption = 'Depth'; }
14        field(50; Active; Boolean) { Caption = 'Active'; InitValue = true; }
15    }
16
17    keys
18    {
19        key(PK; Code) { Clustered = true; }
20    }
21}
1namespace DefaultPublisher.AL;
2
3page 50121 "OptiPack Boxes"
4{
5    PageType = List;
6    ApplicationArea = All;
7    UsageCategory = Lists;
8    SourceTable = "OptiPack Box";
9    Caption = 'OptiPack Boxes';
10
11    layout
12    {
13        area(content)
14        {
15            repeater(Boxes)
16            {
17                field(Code; Rec.Code) { ApplicationArea = All; }
18                field(Description; Rec.Description) { ApplicationArea = All; }
19                field(Width; Rec.Width) { ApplicationArea = All; }
20                field(Height; Rec.Height) { ApplicationArea = All; }
21                field(Depth; Rec.Depth) { ApplicationArea = All; }
22                field(Active; Rec.Active) { ApplicationArea = All; }
23            }
24        }
25    }
26}
Once created, we can navigate to this page using ALT + Q > OptiPack Boxes:
Adding a button to Sales Orders
We’ll extend the Sales Order page of BC to have an extra button that calls our OptiPack API using the ordered items and their quantities. This button can be added to a Warehouse Shipment as well of course.
1pageextension 50133 "SalesOrder_OptiPack" extends "Sales Order"
2{
3    actions
4    {
5        addlast(Processing)
6        {
7            action(CallOptiPack)
8            {
9                Caption = 'Call OptiPack';
10                ApplicationArea = All;
11                Promoted = true;
12                PromotedCategory = Process;
13                PromotedIsBig = true;
14
15                trigger OnAction()
16                var
17                    Mgt: Codeunit "OptiPack Mgt";
18                    Hdr: Record "Sales Header";
19                begin
20                    Hdr := Rec; // current Sales Order
21                    if Hdr."Document Type" <> Hdr."Document Type"::Order then
22                        Error('This action works on Sales Orders only.');
23
24                    Mgt.RunForSalesOrder(Hdr);
25                end;
26            }
27        }
28    }
29}
When opening a Sales Order, we’ll now see this button on top:

Define OptiPack result record
We will store the results of our OptiPack API in a data table with the following definition:
1namespace DefaultPublisher.AL;
2
3table 50125 "OptiPack Run"
4{
5    DataClassification = CustomerContent;
6
7    fields
8    {
9        field(1; "Entry No."; Integer) { AutoIncrement = true; }
10        field(10; "Sales Order No."; Code[20]) { }
11        field(20; "Response Id"; Text[100]) { }
12        field(30; "Created At"; DateTime) { }
13        field(40; "Raw Response"; Blob) { SubType = Memo; }
14    }
15    keys
16    {
17        key(PK; "Entry No.") { Clustered = true; }
18        key(SO; "Sales Order No.") { }
19    }
20}
Calling our API when clicking the button
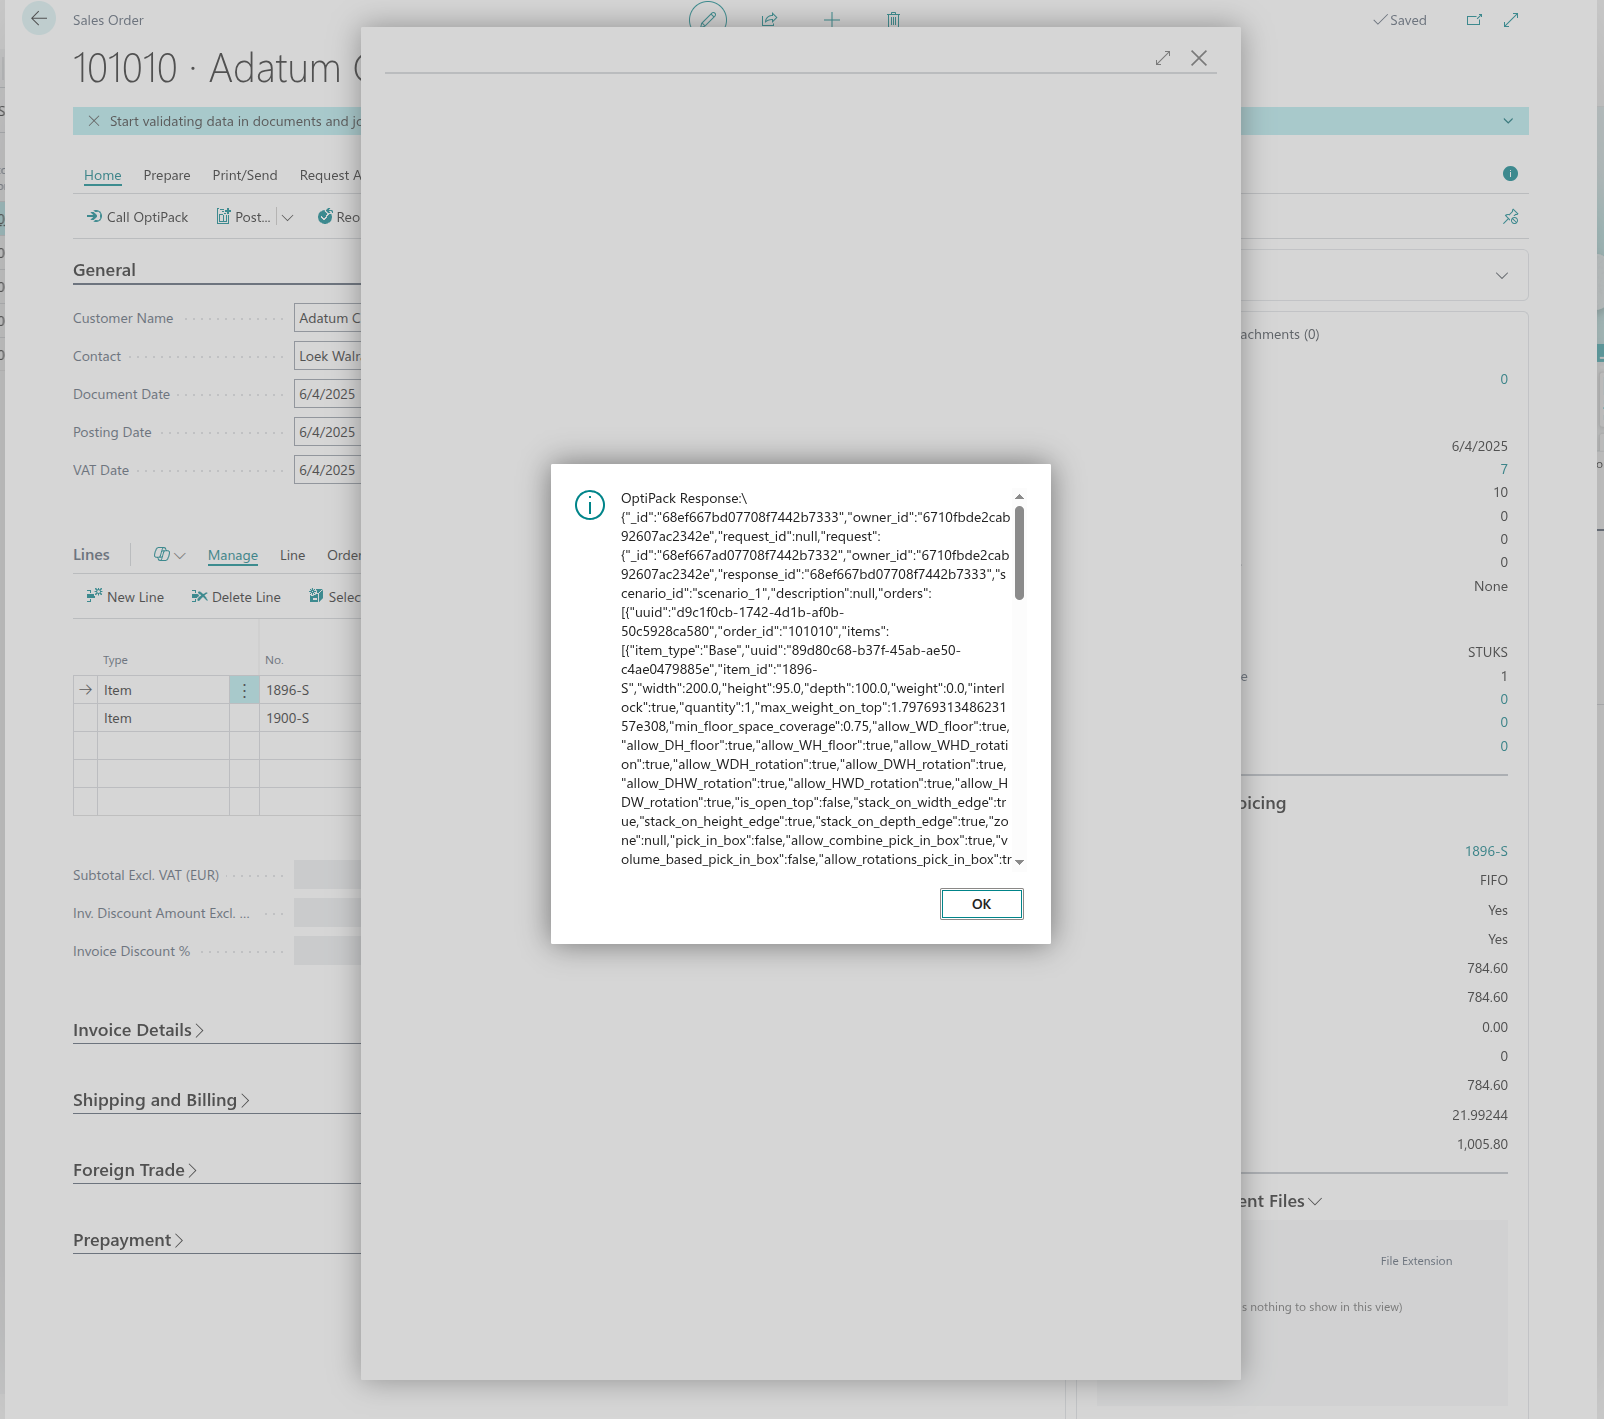
The largest code file contains the logic to call our OptiPack API. The main procedure is called RunForSalesOrder. After declaring the variables, we check if the configuration screen has been filled in properly, if not we show an error message. Afterwards, we start creating a JsonObject that will serve as our request payload. The request consists of a list or orders OrdersArr, a list of bins BinsArr. Each element in the OrdersArr is an object that contains a list of items to pack ItemsArr. We iterate over all items within the Sales Order from where the button was clicked and try to retrieve attributes with names Width, Height, and Length or in Dutch (the language my sandbox environment was set to) Breedte, Hoogte, Diepte using the TryGetDimFromAttributes sub-procedure. In case any of the dimension attributes is missing, an error is thrown that lists which items miss an essential attribute so that their master data can be fixed. When all dimensions can be retrieved an ItemObj with the identifier, dimensions and quantity is made and added to the ItemsArr. After populating that list, the OrderObj is made using the list of items and an identifier. Finally, we retrieve the content from the Box Management page to create BinObj with an identifier, width, height, length to add to the BinsArr. Afterwards we construct the request by adding a scenario_id, the BinsArr and the OrdersArr to the payload and setting the necessary headers, e.g. a header for the API Key, which is then sent to our API. Finally, we parse the response from our API by creating OptiPack Run records for our data table and using our visualisation endpoint the visualise these results within Business Central.
1namespace DefaultPublisher.AL;
2
3using Microsoft.Sales.Document;
4using Microsoft.Inventory.Item;
5
6codeunit 50132 "OptiPack Mgt"
7{
8
9    /// Looks up a decimal attribute for an Item No. by any of the candidate names (case-insensitive, EN/NL)
10    local procedure TryGetDimFromAttributes(ItemNo: Code[20]; CandidateNames: array[2] of Text; var OutVal: Decimal): Boolean
11    var
12        ItemAttr: Record Microsoft.Inventory.Item.Attribute."Item Attribute";
13        ItemAttrValue: Record Microsoft.Inventory.Item.Attribute."Item Attribute Value";
14        Map: Record Microsoft.Inventory.Item.Attribute."Item Attribute Value Mapping";
15        NameLower: Text;
16        Cand1Lower: Text;
17        Cand2Lower: Text;
18        ValTxt: Text;
19        IsDecimal: Boolean;
20    begin
21        OutVal := 0;
22
23        // We need mappings for this Item
24        Map.Reset();
25        Map.SetRange("Table ID", Database::Item);
26        Map.SetRange("No.", ItemNo);
27        if not Map.FindSet() then
28            exit(false);
29
30        // Normalize candidate names to lowercase for matching
31        Cand1Lower := LowerCase(CandidateNames[1]);
32        Cand2Lower := LowerCase(CandidateNames[2]);
33
34        repeat
35            if ItemAttr.Get(Map."Item Attribute ID") then begin
36                NameLower := LowerCase(ItemAttr.Name);
37
38                if (NameLower = Cand1Lower) or (NameLower = Cand2Lower) then begin
39                    if ItemAttrValue.Get(Map."Item Attribute ID", Map."Item Attribute Value ID") then begin
40                        // Value Type can be Decimal/Text/Option; prefer Decimal/Numeric if present
41                        if Evaluate(OutVal, ItemAttrValue.Value) and (OutVal = ItemAttrValue."Numeric Value") then begin
42                            OutVal := ItemAttrValue."Numeric Value";
43                            exit(true);
44                        end else begin
45                            // try to parse the text value
46                            ValTxt := ItemAttrValue.Value;
47                            if Evaluate(OutVal, ValTxt) then
48                                exit(true);
49                        end;
50                    end;
51                end;
52            end;
53        until Map.Next() = 0;
54
55        exit(false);
56    end;
57
58    procedure RunForSalesOrder(var SalesHdr: Record "Sales Header")
59    var
60        Setup: Record "OptiPack Setup";
61        Box: Record "OptiPack Box";
62        SL: Record "Sales Line";
63
64        // Item Attribute tables (standard)
65        ItemAttr: Record Microsoft.Inventory.Item.Attribute."Item Attribute";                       // 7500
66        ItemAttrValue: Record Microsoft.Inventory.Item.Attribute."Item Attribute Value";            // 7501
67        ItemAttrValueMap: Record Microsoft.Inventory.Item.Attribute."Item Attribute Value Mapping"; // 7502
68
69        Http: HttpClient;
70        Resp: HttpResponseMessage;
71        Cnt: HttpContent;
72        ReqHdrs: HttpHeaders;
73        CntHdrs: HttpHeaders;
74
75        Payload: JsonObject;
76        OrdersArr: JsonArray;
77        OrderObj: JsonObject;
78        ItemsArr: JsonArray;
79        ItemObj: JsonObject;
80        BinsArr: JsonArray;
81        BinObj: JsonObject;
82        Root: JsonObject;
83        Tok: JsonToken;
84        ResponseId: Text;
85
86        BodyTxt: Text;
87        MissingTxt: Text;
88        MissingPerItem: Text;
89        W, H, L : Decimal;
90        Qty: Decimal;
91
92        WidthStrings: array[2] of Text;
93        HeightStrings: array[2] of Text;
94        LengthStrings: array[2] of Text;
95
96        Run: Record "OptiPack Run";
97        os: OutStream;
98        VizUrl: Text;
99        VizHttp: HttpClient;
100        VizResp: HttpResponseMessage;
101        VizCntHdrs: HttpHeaders;
102        VizHtml: Text;
103        VizPage: Page "OptiPack Visualisation";
104    begin
105        // Setup
106        if not Setup.FindFirst() then
107            Error('Open "OptiPack Setup" and click Create/Init, then fill URL and API key.');
108        if (Setup."Pack URL" = '') or (Setup."Pack API Key" = '') then
109            Error('OptiPack Setup is incomplete. URL/API key missing.');
110
111        // Collect items from this Sales Order
112        OrdersArr := OrdersArr;
113        OrderObj := OrderObj;
114        ItemsArr := ItemsArr;
115
116        SL.SetRange("Document Type", SL."Document Type"::Order);
117        SL.SetRange("Document No.", SalesHdr."No.");
118        SL.SetRange(Type, SL.Type::Item);
119
120        if SL.FindSet() then
121            repeat
122                Qty := SL.Quantity;
123                if Qty <= 0 then
124                    continue;
125
126                WidthStrings[1] := 'Width';
127                WidthStrings[2] := 'Breedte';
128                HeightStrings[1] := 'Height';
129                HeightStrings[2] := 'Hoogte';
130                LengthStrings[1] := 'Length';
131                LengthStrings[2] := 'Diepte';
132                // Fetch dimensions from Item Attributes (supports EN + NL names)
133                if not TryGetDimFromAttributes(SL."No.", WidthStrings, W) then
134                    W := 0;
135                if not TryGetDimFromAttributes(SL."No.", HeightStrings, H) then
136                    H := 0;
137                if not TryGetDimFromAttributes(SL."No.", LengthStrings, L) then
138                    L := 0;
139
140                MissingPerItem := '';
141                if W = 0 then MissingPerItem += 'Width/Breedte ';
142                if H = 0 then MissingPerItem += 'Height/Hoogte ';
143                if L = 0 then MissingPerItem += 'Length/Diepte ';
144
145                if MissingPerItem <> '' then begin
146                    if MissingTxt <> '' then MissingTxt += '';
147                    MissingTxt += StrSubstNo('Item %1 missing: %2', SL."No.", MissingPerItem);
148                end else begin
149                    Clear(ItemObj);
150                    ItemObj.Add('id', SL."No.");
151                    ItemObj.Add('width', W);
152                    ItemObj.Add('height', H);
153                    ItemObj.Add('depth', L); // map Length/Diepte -> depth
154                    ItemObj.Add('quantity', Qty);
155                    ItemsArr.Add(ItemObj);
156                end;
157            until SL.Next() = 0;
158
159        if MissingTxt <> '' then
160            Error(MissingTxt);
161        if ItemsArr.Count() = 0 then
162            Error('No qualifying item lines with dimensions on Sales Order %1.', SalesHdr."No.");
163
164        // Build orders array
165        Clear(OrderObj);
166        OrderObj.Add('id', SalesHdr."No.");
167        OrderObj.Add('items', ItemsArr);
168        OrdersArr.Add(OrderObj);
169
170        // Build bins from OptiPack Boxes (Active only)
171        BinsArr := BinsArr;
172        Box.SetRange(Active, true);
173        if Box.FindSet() then
174            repeat
175                Clear(BinObj);
176                BinObj.Add('id', Box.Code);
177                BinObj.Add('width', Box.Width);
178                BinObj.Add('height', Box.Height);
179                BinObj.Add('depth', Box.Depth);
180                BinsArr.Add(BinObj);
181            until Box.Next() = 0
182        else
183            Error('No active OptiPack Boxes found. Open "OptiPack Boxes" and create at least one.');
184
185        // Build payload
186        Clear(Payload);
187        Payload.Add('scenario_id', Setup."Scenario Id");
188        Payload.Add('orders', OrdersArr);
189        Payload.Add('bins', BinsArr);
190
191        Payload.WriteTo(BodyTxt);
192        Cnt.WriteFrom(BodyTxt);
193
194        // Content headers
195        Cnt.GetHeaders(CntHdrs);
196        if CntHdrs.Contains('Content-Type') then CntHdrs.Remove('Content-Type');
197        CntHdrs.Add('Content-Type', 'application/json');
198
199        // Request headers
200        ReqHdrs := Http.DefaultRequestHeaders();
201        if ReqHdrs.Contains('Accept') then ReqHdrs.Remove('Accept');
202        if ReqHdrs.Contains('x-api-key') then ReqHdrs.Remove('x-api-key');
203        ReqHdrs.Add('Accept', 'application/json');
204        ReqHdrs.Add('x-api-key', Setup."Pack API Key");
205
206        Http.Timeout := 120000;
207        if not Http.Post(Setup."Pack URL", Cnt, Resp) then
208            Error('HTTP POST failed.');
209
210        Resp.Content().ReadAs(BodyTxt);
211        if not Resp.IsSuccessStatusCode() then
212            Error('OptiPack error %1: %2', Resp.HttpStatusCode(), CopyStr(BodyTxt, 1, 4000));
213
214        Message('OptiPack Response:%1%2', '', CopyStr(BodyTxt, 1, 4000));
215        // 1) Parse response_id (or request_id) from JSON
216        if Root.ReadFrom(BodyTxt) then begin
217            if Root.Get('_id', Tok) and Tok.IsValue() then
218                ResponseId := Tok.AsValue().AsText()
219            else if Root.Get('request_id', Tok) and Tok.IsValue() then
220                ResponseId := Tok.AsValue().AsText();
221        end;
222
223        if ResponseId <> '' then begin
224            Run.Init();
225            Run."Sales Order No." := SalesHdr."No.";
226            Run."Response Id" := CopyStr(ResponseId, 1, 100);
227            Run."Created At" := CurrentDateTime();
228            Run."Raw Response".CreateOutStream(os);
229            os.WriteText(CopyStr(BodyTxt, 1, MaxStrLen(BodyTxt)));
230            Run.Insert();
231
232            COMMIT;
233
234            VizUrl := StrSubstNo('https://optiapp.api.optioryx.com/visualisation/interactive/%1/0/0?offline=false', ResponseId);
235
236            VizHttp.DefaultRequestHeaders().Add('Accept', 'text/html');
237            VizHttp.DefaultRequestHeaders().Add('x-api-key', Setup."Pack API Key");
238
239            if not VizHttp.Get(VizUrl, VizResp) then begin
240                Error('HTTP GET failed for visualisation.');
241            end;
242
243            VizResp.Content().ReadAs(VizHtml);
244
245            if not VizResp.IsSuccessStatusCode() then
246                Error('Visualisation error %1: %2', VizResp.HttpStatusCode(), CopyStr(VizHtml, 1, 4000));
247
248            // 5) Show in the viewer page
249            VizPage.LoadHtml(VizHtml);
250            VizPage.RunModal();
251        end else
252            Message('Pack call succeeded but no response id was found. Response:%1%2', '', CopyStr(BodyTxt, 1, 4000));
253    end;
254}
Visualising the packing result in BC
The OptiPack API contains an endpoint that returns HTML with an interactive visualisation that can be embedded in another system. We will integrate this visualisation in Business Central as a final step. We first create a page:
1page 50128 "OptiPack Visualisation"
2{
3    PageType = Card;
4    ApplicationArea = All;
5    Caption = 'OptiPack Visualisation';
6
7    layout
8    {
9        area(content)
10        {
11            usercontrol(Viewer; "OptiPack.HtmlViewer")
12            {
13                ApplicationArea = All;
14
15                trigger Ready()
16                begin
17                    IsReady := true;
18                    if HtmlToLoad <> '' then begin
19                        CurrPage.Viewer.SetHtml(HtmlToLoad);
20                        // Optional: clear buffer after push
21                        // HtmlToLoad := '';
22                    end;
23                end;
24            }
25        }
26    }
27
28    var
29        HtmlToLoad: Text;
30        IsReady: Boolean;
31
32    /// Call this BEFORE or AFTER the page opens; it buffers until the add-in is ready.
33    procedure LoadHtml(Html: Text)
34    begin
35        HtmlToLoad := Html;
36        if IsReady then
37            CurrPage.Viewer.SetHtml(HtmlToLoad);
38    end;
39
40    trigger OnOpenPage()
41    begin
42        // in case Ready already fired quickly on some clients, the buffer logic still works
43    end;
44}
Which contains the following HTMLViewer:
1namespace DefaultPublisher.AL;
2
3controladdin "OptiPack.HtmlViewer"
4{
5    RequestedHeight = 700;
6    RequestedWidth = 1000;
7    MinimumHeight = 300;
8    MinimumWidth = 600;
9    VerticalStretch = true;
10    HorizontalStretch = true;
11
12    Scripts = 'scripts/optipackviewer.js'; // add this file to your project
13    StartupScript = 'scripts/optipackviewer.js';
14
15    event Ready();
16
17    procedure SetHtml(Html: Text);
18}
This embeds the HTML returned by our API in a page using this simple javascript script:
1(function () {
2  var container, iframe;
3
4  function ensure() {
5    // BC injects <div id="controlAddIn"> as the host root
6    container = document.getElementById('controlAddIn');
7    if (!container) {
8      // very defensive: if not yet present, retry soon
9      setTimeout(ensure, 10);
10      return;
11    }
12    container.style.margin = '0';
13    container.style.padding = '0';
14    container.style.width = '100%';
15    container.style.height = '100%';
16    container.style.overflow = 'hidden';
17
18    if (!iframe) {
19      iframe = document.createElement('iframe');
20      iframe.setAttribute('title', 'OptiPack Visualisation');
21      iframe.style.border = '0';
22      iframe.style.width = '100%';
23      iframe.style.height = '100%';      // Fill add-in
24      iframe.style.display = 'block';
25      container.appendChild(iframe);
26
27      // Signal BC that the add-in is ready
28      if (Microsoft && Microsoft.Dynamics && Microsoft.Dynamics.NAV) {
29        Microsoft.Dynamics.NAV.InvokeExtensibilityMethod('Ready', []);
30      }
31    }
32  }
33
34  // Write full HTML string into the iframe document
35  function writeHtmlToIframe(html) {
36    ensure();
37    if (!iframe) return;
38
39    // Inject CSS to guarantee the viz has measurable height
40    var headBoost =
41      '<style>html,body{height:100%;margin:0;padding:0;overflow:hidden;} ' +
42      '#root,#app,.container,.visualization-container{height:100% !important;} ' +
43      'iframe,canvas,svg{max-width:100%;}</style>';
44
45    var doc = iframe.contentWindow.document;
46    doc.open();
47    // Prepend our boost style before user HTML
48    doc.write(headBoost + (html || ''));
49    doc.close();
50
51    // If content relies on layout after load, try a couple of resizes
52    try {
53      var tryResize = function () {
54        var body = doc.body, de = doc.documentElement;
55        var h = Math.max(
56          body.scrollHeight, body.offsetHeight,
57          de.clientHeight, de.scrollHeight, de.offsetHeight
58        );
59        // If parent add-in is stretching, keep iframe at 100%; if zero, fallback to content height
60        if (container && container.clientHeight === 0 && h > 0) {
61          iframe.style.height = h + 'px';
62        } else {
63          iframe.style.height = '100%';
64        }
65      };
66      setTimeout(tryResize, 50);
67      setTimeout(tryResize, 300);
68      window.addEventListener('resize', tryResize);
69    } catch (e) {
70      // ignore
71    }
72  }
73
74  // Expose to AL
75  window.SetHtml = function (html) {
76    writeHtmlToIframe(String(html || ''));
77  };
78
79  // Initial setup
80  ensure();
81})();
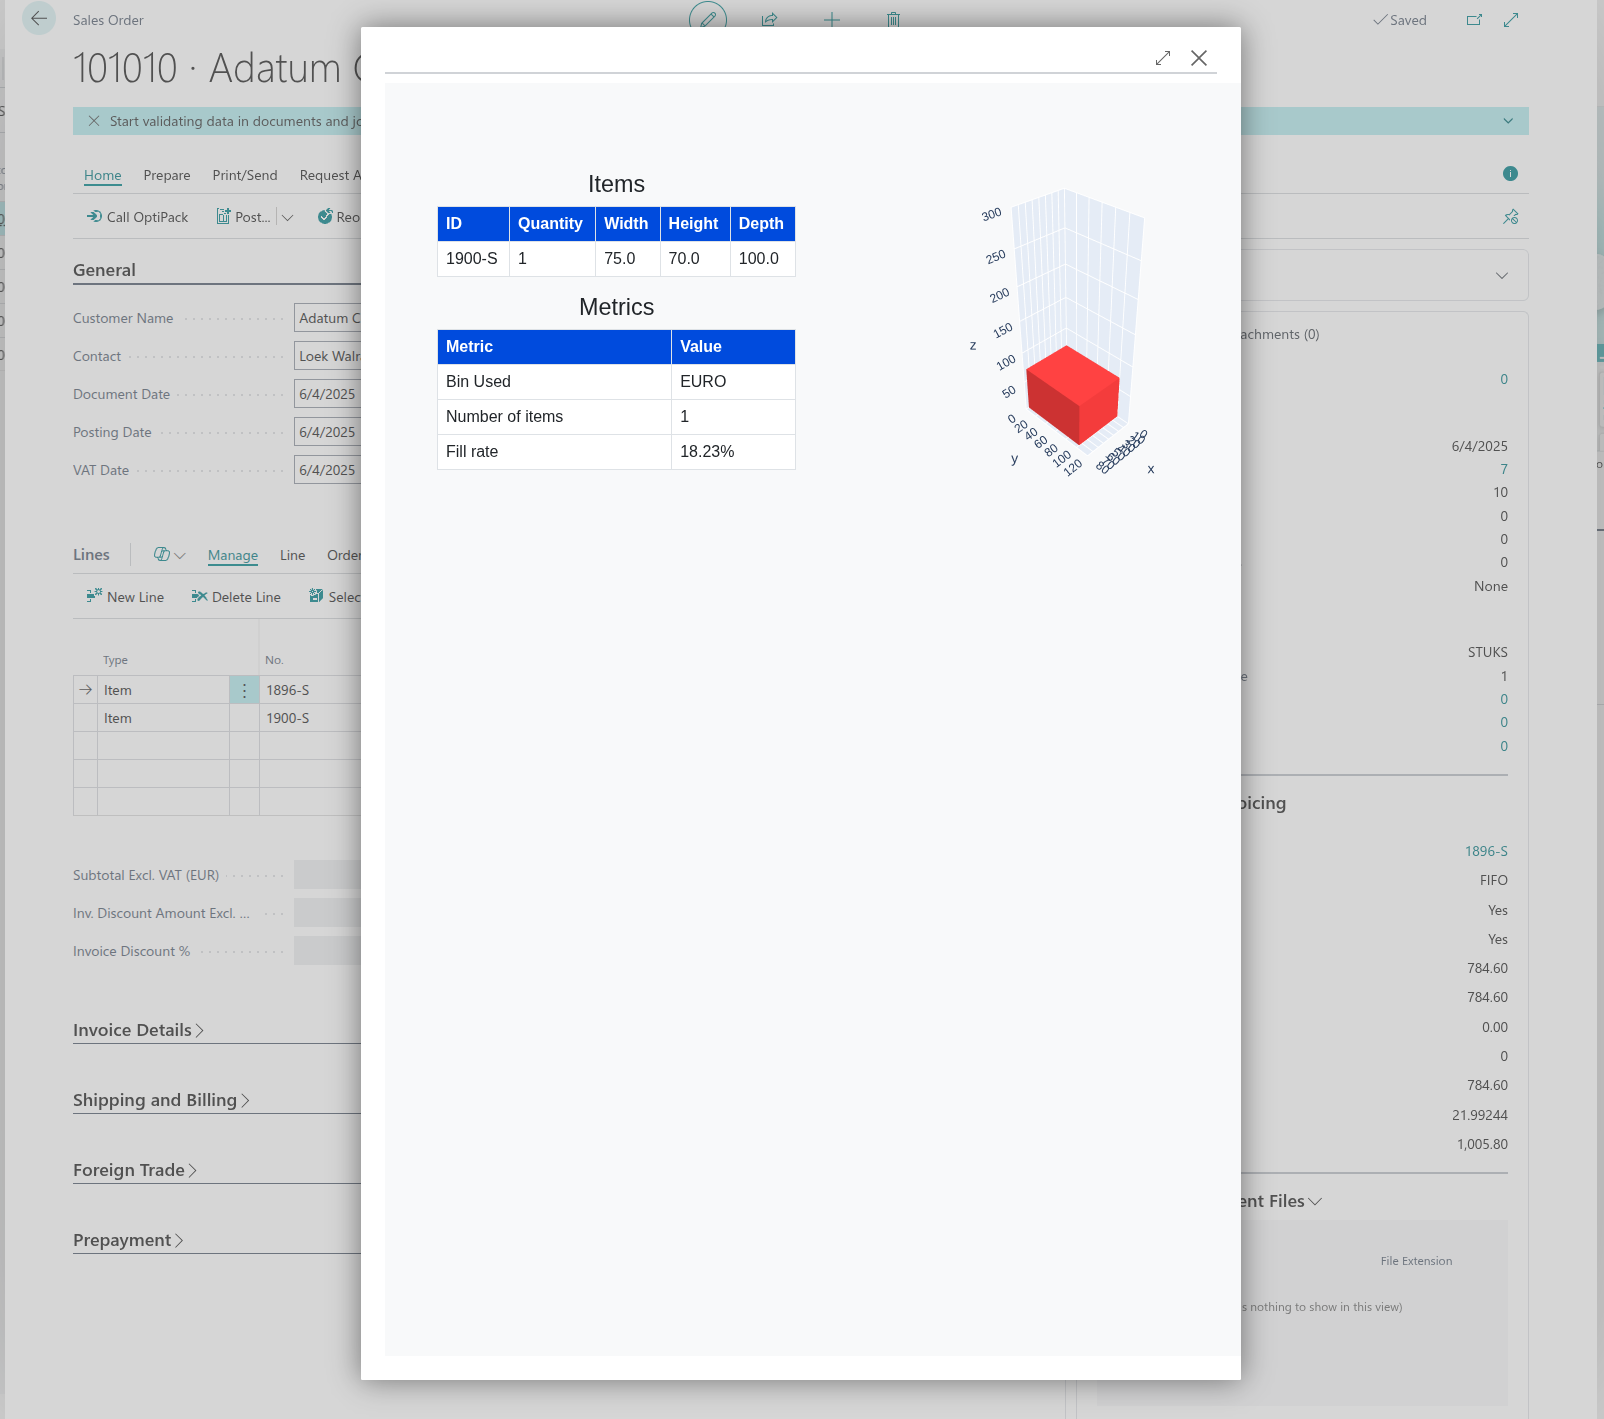
The result is the following:
Field mapping (recap)
| OptiPack JSON | Business Central source |
|---|---|
orders[].id | Sales Order No. (Sales Header."No.") or Warehouse Shipment No. (if you pack per shipment) |
orders[].items[].id | Item No. (Sales Line."No.") |
orders[].items[].quantity | Sales Line.Quantity (or Qty. to Ship if partials) |
orders[].items[].width/height/depth | Item Attributes (e.g., Width/Breedte, Height/Hoogte, Length/Diepte) or custom fields |
orders[].items[].weight (optional) | Item Attribute or Unit Weight field if you keep one |
orders[].items[].allowed_orientations / fragile flags (optional) | Item Attributes / custom flags |
bins[].id | OptiPack Box Code (OptiPack Box.Code) |
bins[].width/height/depth | OptiPack Box.Width/Height/Depth |
other bins[] constraints (max weight, stack limits, etc.) | Add columns to OptiPack Box and pass through |
scenario_id | OptiPack Setup."Scenario Id" |
Where to call OptiPack in BC?
Pick a path (teams usually start with A, then evolve to B):
A) After Shipment is ready (simplest POC)
- Users create Warehouse Shipments as usual.
- From Sales Order or Warehouse Shipment, call OptiPack with the order’s lines (Item No., quantity, dimensions/weight).
- Show the packing plan + visualization to the packer.
Pros: Very low friction, minimal dev.
Cons: You still pack manually in BC (unless you write back as packages).
B) Shipment-centric with package write-back
- When a Warehouse Shipment is ready for packing, collect its lines → build one OptiPack
order. - Call OptiPack; on success, create BC Packages/Lines (or your custom Package tables) per OptiPack result.
- Print labels / hand over to your carrier add-on.
Pros: Produces system packages you can label/ship.
Cons: Requires a small “write-back” layer (custom page/table or a package add-on).
Note: Cartonization does not depend on Bin Code allocation. You only need the order’s items, quantities, and physical attributes, plus your box catalog.
Persisting the results (BC)
- Store the run header:
OptiPack Runwith Sales Order No., response/request id, timestamp, raw payload/response (Blob). - Write system packages (optional):
- If you already use a packing add-on, convert OptiPack bins → add-on’s package tables.
- If not, add a simple “OptiPack Package” table (Header + Lines) and render it on a “Packing Worksheet” page for label printing.
- Keep traceability: Save the
response_id, selected box per order, total cubic fill, and any rule flags (e.g., “fragile kept upright”) for KPIs.
Setup checklist (BC)
Read permissions
Sales Header/Line,Item,Item Attribute / Attribute Value / Mapping.
Write permissions
OptiPack Setup,OptiPack Box,OptiPack Run(and your optional Package tables).
Data quality
- Item Attributes for Width/Height/Length (and Weight if used) consistently maintained.
- Units are consistent between items and boxes (cm/mm/in). If they aren’t, normalize before sending.
Connectivity & security
- Allow outbound HTTPS to
optiapp.api.optioryx.com. - Keep API key in Masked field; restrict access to OptiPack Setup.
Feature toggles
- Add
OptiPack EnabledandShow Visualisationbooleans in Setup so ops can bypass quickly.
Box catalog
- Maintain active boxes in OptiPack Boxes. Add optional columns you need (see our API docs for possible attributes and constraints our algorithm supports).
Additional Tips & Tricks
Reliability & monitoring
- Retry with exponential backoff on HTTP 429/5xx.
- Set a sensible timeout; on timeout, fall back to current manual packing.
- Log: order/shipment id, request hash, HTTP code, response id, decision (optimized vs fallback).
Idempotency
- Use the BC order/shipment no. + a timestamp as a run key.
- If you re-run, upsert the OptiPack Run and overwrite packages only when you confirm.
Performance
- Build the JSON directly from
Sales Linejoined to Attribute Mappings (filter by current order/shipment). - Validate all required attributes in one pass; present a single error list to fix master data.
Data fidelity
- If an item has multiple UoMs, ensure the dimensions match the selling UoM (e.g., pack-size vs each).
- For sets/kits, expand to component items with physical dimensions before sending.
UX
- Show the interactive visualization inline (your control add-in) and provide a quick “Copy result summary” action: chosen box, fill rate, #boxes, weight.
Governance
- Keep an eye on box creep: archive inactive sizes so the optimizer searches only real, stocked cartons.
- Add a simple A/B toggle: operator can compare OptiPack result with “default box” to build trust.